Make a Starburst background
Back to the Photo Lesson PageStart off by making a new document 8 inches by 8 inches at 72 pixels per inch.
Use the Gradient tool
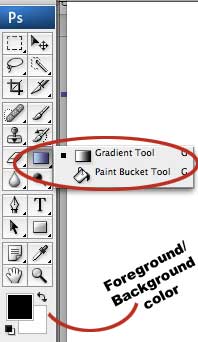
and make a nice black to white gradient.
To do that make sure you have default black and white colors in the "Foreground/Background" color box on the tool palette.
Then click and drag from bottom to top while holding the shift key down. (The shift key constrains the tool to make a perfectly straight up and down line.)

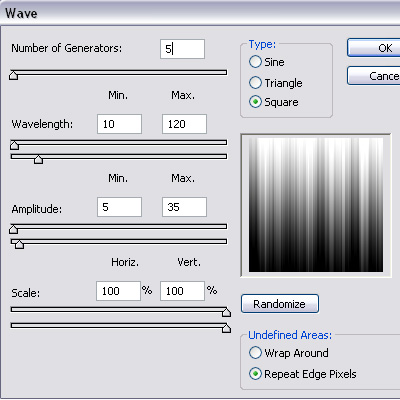
Next choose Filter > Distort > Wave and use the following settings.
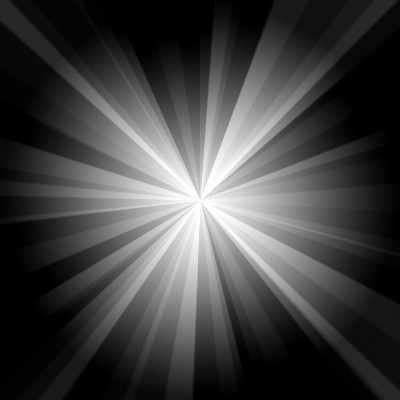
Next choose Filter > Distort > Polar Coordinates, and use the default settings.
Duplicate your current layer, and rotate is 90 degrees. To do this choose Edit > Transform > Rotate 90 degrees. Next change the layer mode to "Overlay"
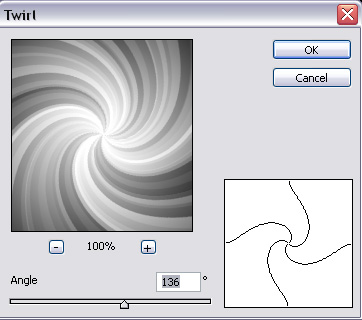
While you're still on this second layer we are going to add one more filter. Choose Filter > Distort > Twirl.
You should have a pretty interesting design going by now, if you want to give some color to it make a new layer and add a radial gradient with some color.
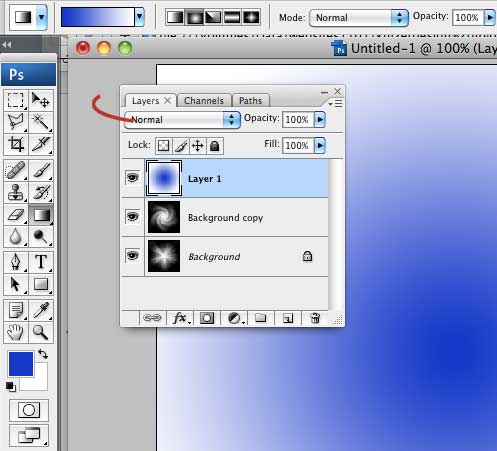
Next, change the layer mode to "color." The Layer mode is marked with the red swoosh in the image above.
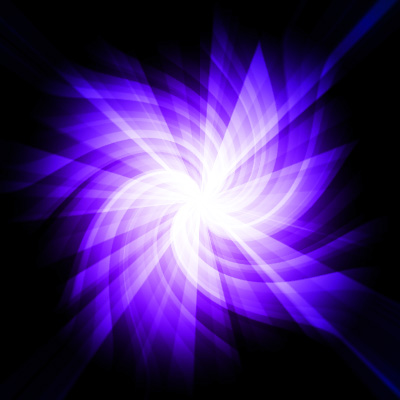
To make the image below I added a purple - blue gradient.
This is looking fairly interesting, but I'm going for more of a "vortex" feel, so lets add some depth. Once you have colored your image flatten all the layers. To do this choose Layer > Flatten Image.
Now go to Filter >Distort > Pinch.
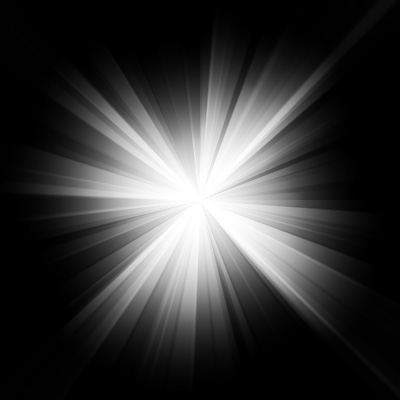
You should have something similar to the picture above!
4 points extra credit if you turn in a starburst with text (words) that appear as if they're falling into the vortex or flying out of it.
(Remember to rasterize the text layer by right-clicking on the layer and choosing "Rasterize". Then you can "perspectivize" the text by choosing Edit>Transform>perspective. And don't forget to twirl it as well.)
Back to the Photo Lesson Page