
As an example, instead of taking a picture of your Mother's smiling face filling the frame, maybe take a shot of her hands kneading bread dough. (Nice face shots can be taken too, but do more than show us pretty faces.)
What are you trying to say? What are you trying to capture? Anyone can snap a picture on their smart phone. An artist is going to compose the photo and tell a story through that photo.
Let's say the subject is "Toys". A shot taken up high gives the impression of the parent view. Down low, kids view. Single toy, lonely. Child playing with the toy, happy...
Every shot you compose should be taken as if it's going to be on the cover of a book and will help tell the story of that book.
After the film is completely used and rewound, students will develop the pictures. Follow these directions (printable version here):
1. Open the film in our light proof room and roll it onto the film reel, then put it in the light-safe tank and screw it shut.
2. Pour in 400 ml (around 12 ounces) of water and use quarter turn and tilt agitations as demonstrated by the teacher for 1 minute. 3. Pour out the water (without opening the light-safe tank).
4. Pour in 400 ml of film developer and agitate it as in step 2 for 6-7 minutes.
5. Pour used developer out into our developer "disposal bottles".
6. 400 ml of Stop bath, agitate for 30 seconds and pour into Stop "disposal bottles".
7. 400 ml of Fixer. Agitate as in step two for 7 minutes. We will re-use our Fixer so pour that back into the Film Fix bottle when done..
8. Open the reel container and check the negatives. If they appear purple and thick or not transparent, repeat steps 2-7 again.
9. Pour in 400 ml of water and agitate for 60 seconds and pour it out.
10. Open the tank and unroll the negatives. Squeegee them between your fingers (or with our squeegee) to dry the negatives so no water spots are left on them and hang the negatives to dry.
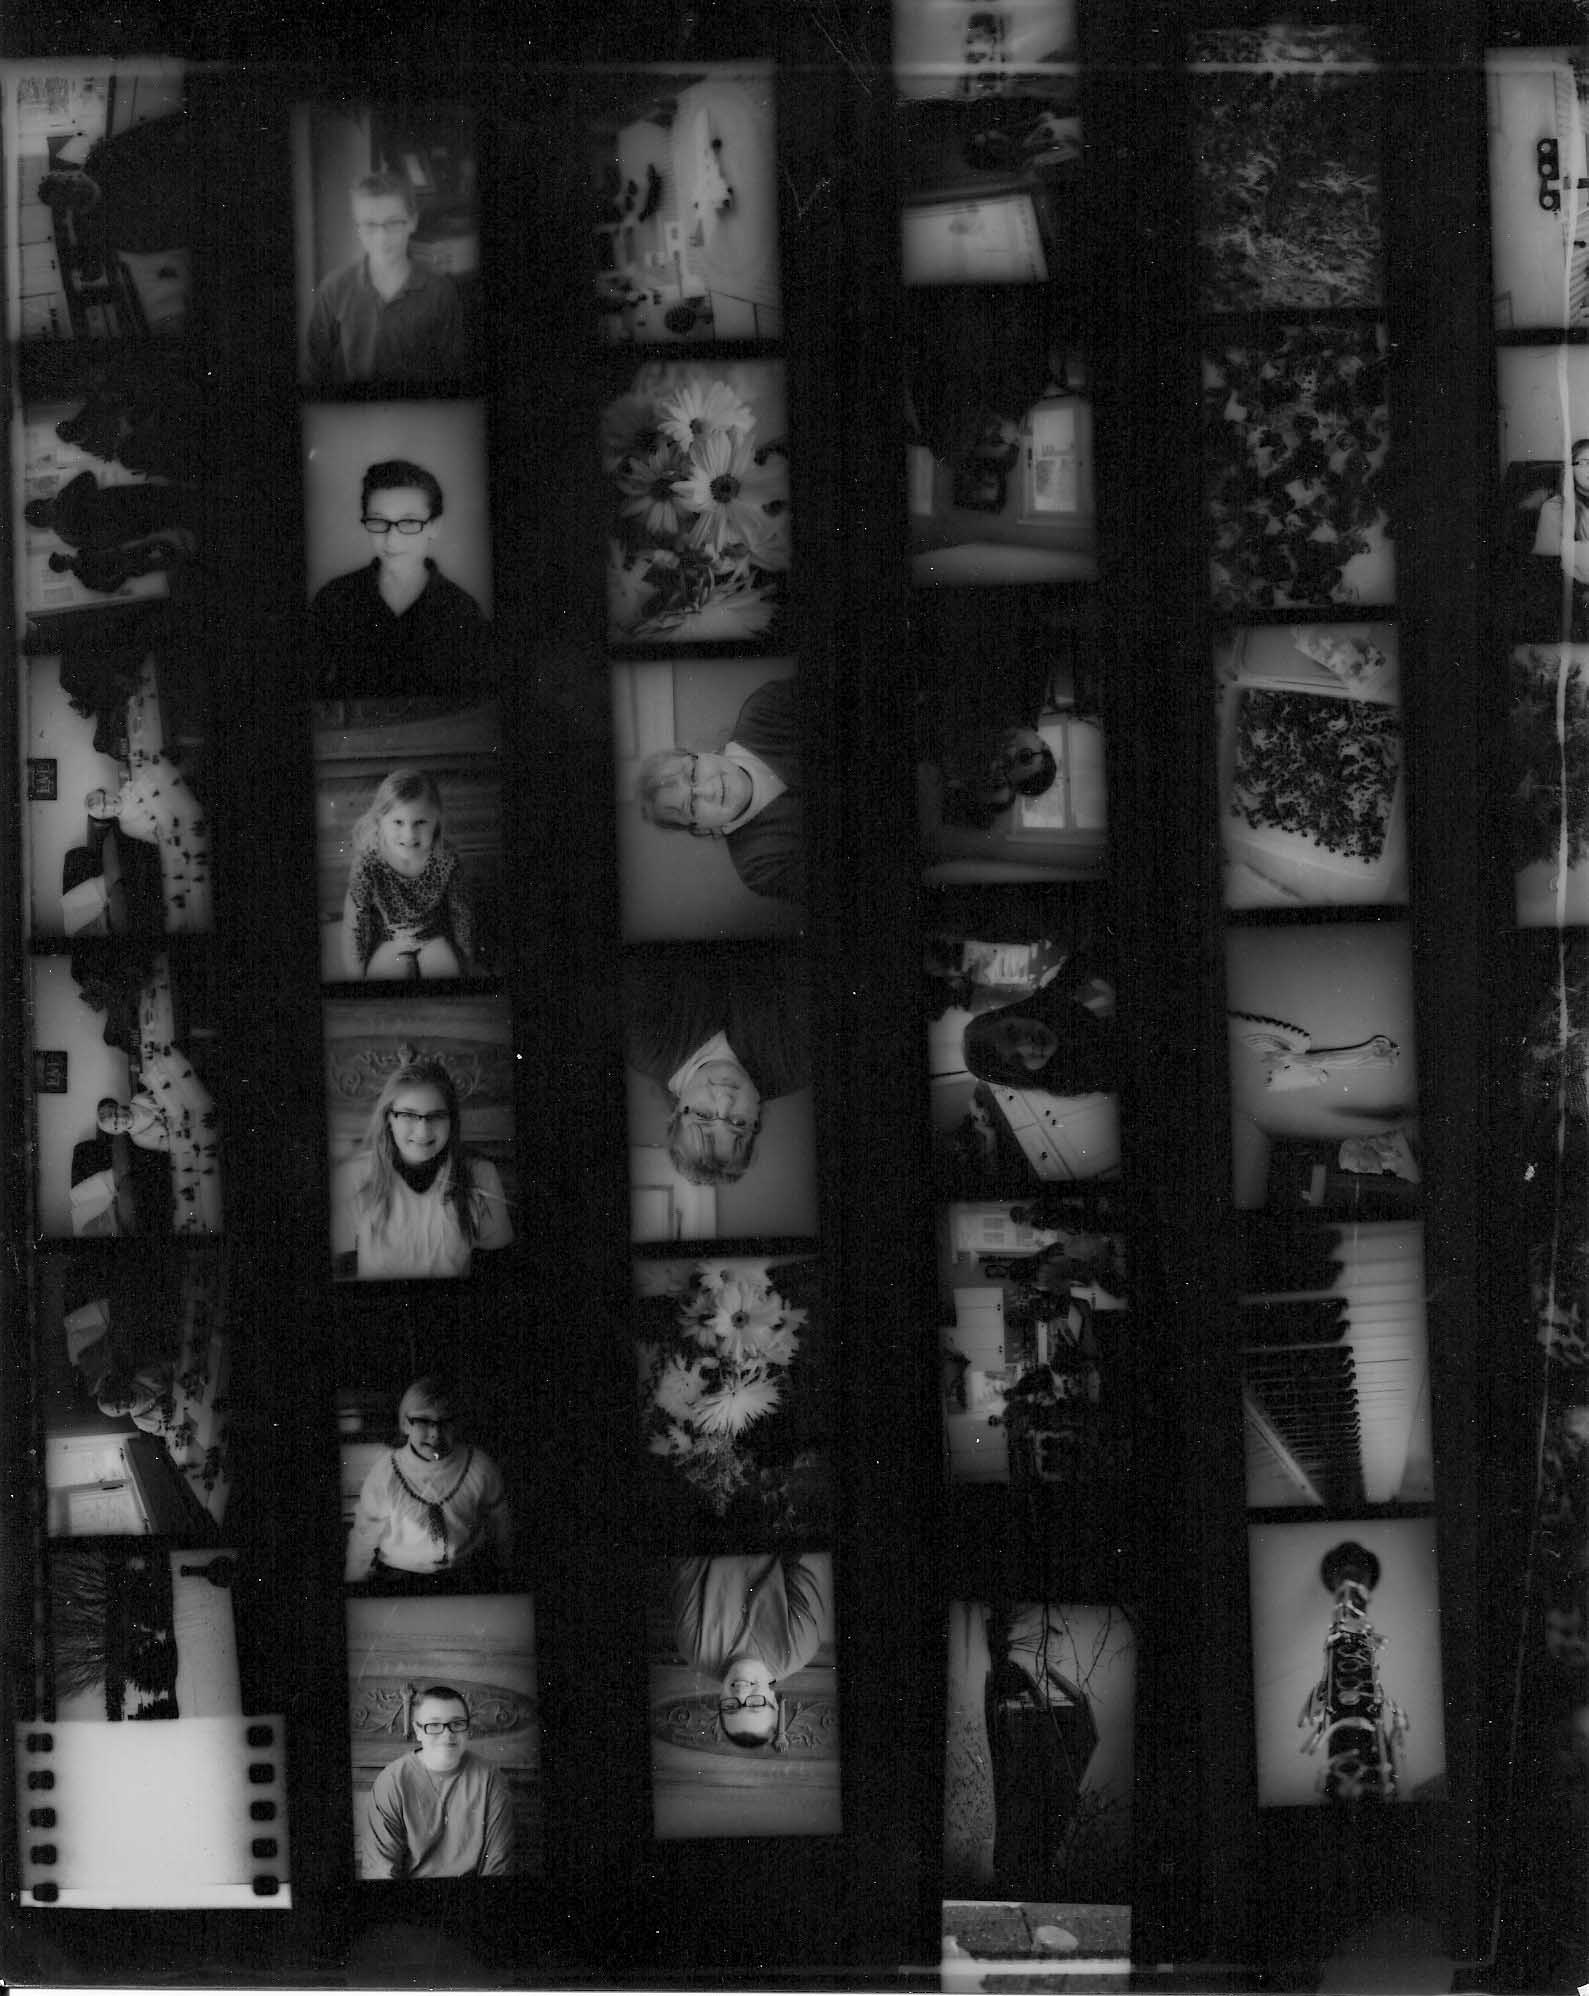
After the negatives have dried completely cut them into lengths of six, slide them into the Contact Sheets and make a contact print of them. (Expose contact print for 15 seconds with an aperture of F-8.)
Evaluation
10 points will be awarded based on how the photos interpret the student's family as described above and how well the negatives turn out. (Properly exposed, properly rolled and developed)
Turn in negatives and contact print