

*Students are given small lumps of clay. Sometimes we squish and fold it to mix it up a little.
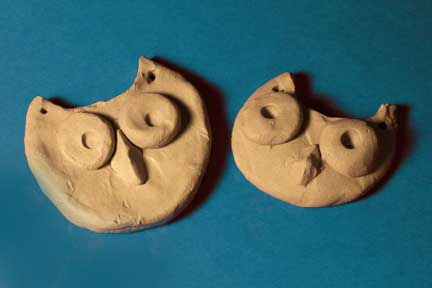
*Students make the lump into a big ball and squish it between their hands to flatten it. Then they cut an arc out of the top with their toothpick "multi-tool". This forms the owl shape and pointy ears. The lump is set aside to make the beak and eyes. They smooth out the cut edge so it's not sharp.
*Next a small beak by putting their index finger and thumb together on both hands, then putting the fingers and thumbs together to make a diamond shape and then pressing the fingers and thumbs down onto the round ball, creating a pyramid/triangle shape for the beak.
*Scratch and attach the beak.
*Students next make round balls with the remaining clay and scratch and attach them to the head.
*Press pencils in to the eyes to make pupils and press toothpicks through the ears and wiggle them around to open the holes sufficiently to allow string to be placed through them after fireing.
*Scratch their names on the back before handing in.
*Feather texture is added using popsicle sticks.
*The owls are painted after the they are fired. Scroll down for painting instructions.

Instructions for painting:
1. White eyes
2. Clean brush
3. Yellow Beak
4. Clean brush
5. Brown owl
6. Clean brush
7. Black pupils
8. Clean brush
9. Give owl to Mr. Kulzer
10. Clean table
11. If need be, get a clean paper towel for the next class.